I was teaching timber framing to a group of students, and we were holding bimonthly sessions. One session only one student showed up. He and I talked over what could we do that was interesting or different for us to do. We decided we’d cut some curved knee brace stock from a curved log that I had my logger bring in for us to use.
We took one curved log and put it on the sawmill and cut one side flat. We flipped it over and cut the opposite side flat. Then we cut it down the middle.
This is what the two “book matched” pieces looked like after we took them off the mill:
Next we took one and put it up on the saw horses, and shaved off all the bark using a draw knife.
We then picked out an already completed brace that we wanted to use as a pattern for laying out the locations for the tenons.
Here is the brace stock on the saw horses:

Here you can see the tools we used as well. They are a standard framing square, a combination square and a bevel angle gauge. And to help us with the layout line we used a straight piece of square metal tubing.
The first thing we did was, we picked out the center of the arc. We then laid the standard brace on top of the curved stock and transferred the “working points” locations from the standard brace down onto the curved stock. These “working points” are the two ends of the hypotenuse of the right triangle.
Then using the square tubing we laid it onto the curved stock to represent this “hypotenuse.”
This gave us a solid object that we could reference our layout tools against in order to draw the tenon layout lines. This worked very well for us.

We laid out the tenons and cut away all the extra wood from the curved brace stock.
We had already cut the standard mortises in both the tie beam and the posts and had test fit the standard brace into them to insure that these mortises and the brace were correct in size and length.
Once the long tenons on the curved stock were created, we measured them. Then we extended the mortises in the post and the tie beam to the length of these tenons plus a little bit.

We placed one end of the curved brace tenon into the extended mortise and checked to see if the extended housing was cut long enough for the long shoulder on the curved brace. We also cut the extended housing at a curve to match the bark side of the curved brace stock.
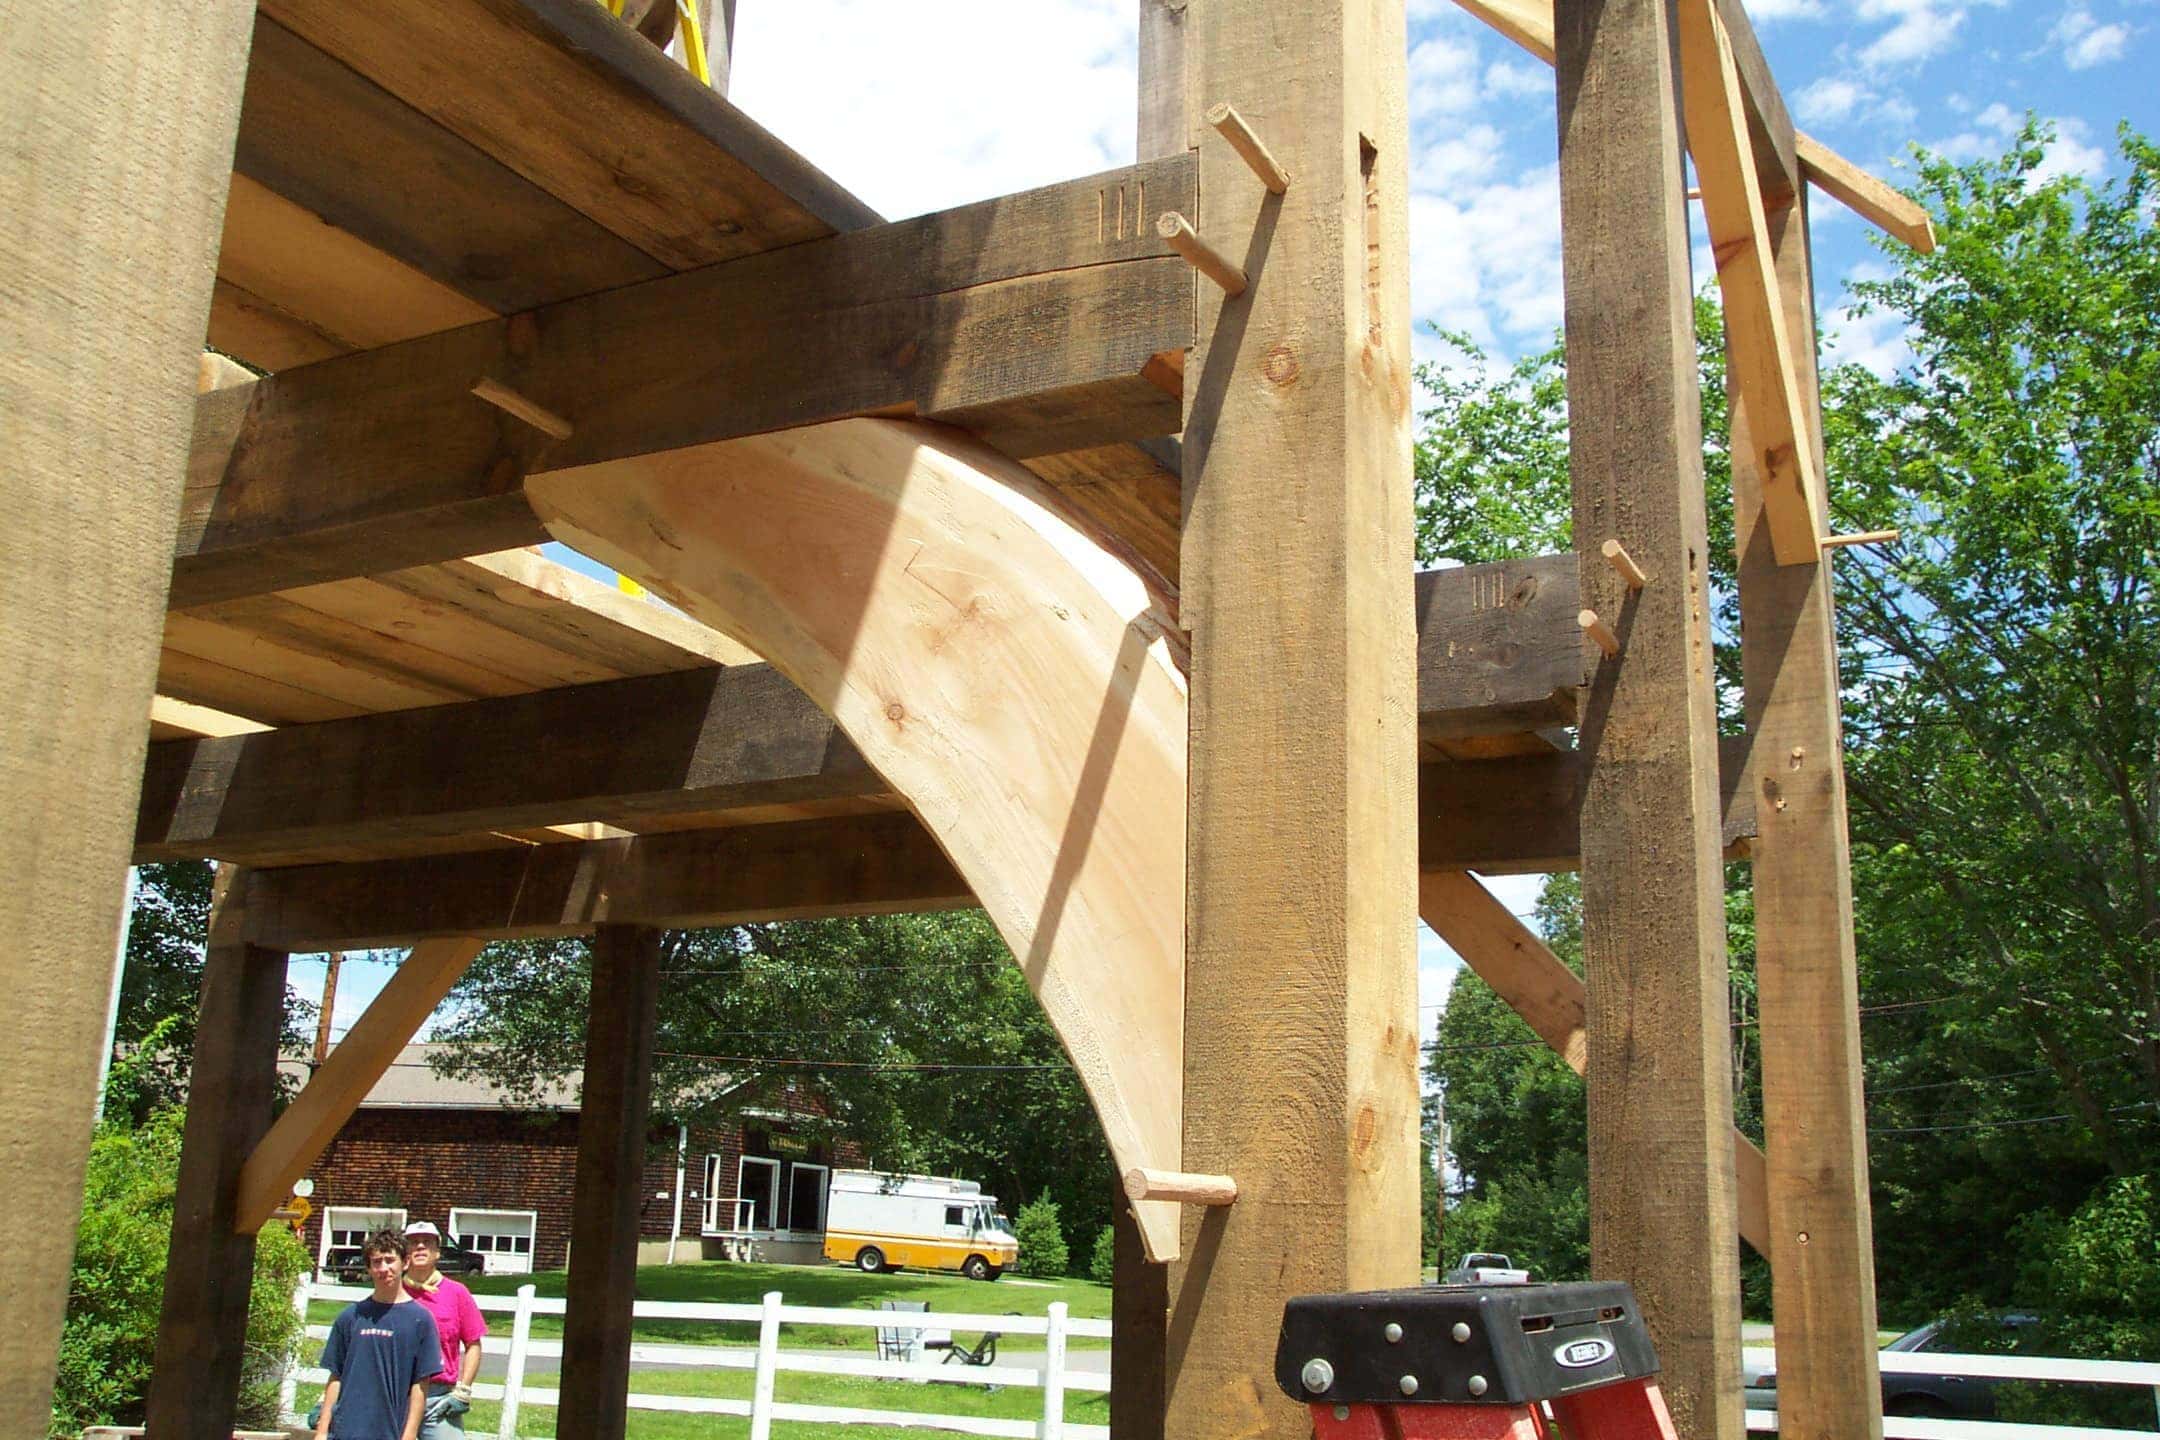
You can see this here in this picture of the tie beam just as the bent was being put together.

When they are in place they look very nice:
And a benefit to using a curved brace is it allowed more head clearance in the room:
I hope this short story has helped you to see how you could use a curved brace in your frame.
The post How to Make and Use Curved Knee Brace Stock appeared first on Timber Frame HQ.


